| Description | Hands On Lab Exercises for HPC |
|---|---|
| Related-course materials | HPC |
| Authors | Ndomassi TANDO (ndomassi.tando@ird.fr) |
| Creation Date | 14/03/2018 |
| Last Modified Date | 20/03/2019 |
Summary
- Preambule: Softwares to install before connecting to a distant linux server
- Practice 1: Get connecting on a linux server by
ssh - Practice 2: Reserve one core of a node using qrsh and create your working folder
- Practice 3: Transfering files with filezilla
sftp - Practice 4: Transfering data to the node
scp - Practice 5: Use module environment to load your tool
- Practice 6: Launch analyses
- Practice 7: Transfering data to the nas servers
scp - Practice 8: Deleting your temporary folder
- Practice 9: Launch a job via qsub
- Links
- License
Preambule
Getting connected to a Linux servers from Windows with SSH (Secure Shell) protocol
| Platform | Software | Description | url |
|---|---|---|---|
 |
mobaXterm | an enhanced terminal for Windows with an X11 server and a tabbed SSH client | more |
 |
putty | Putty allows to connect to a Linux server from a Windows workstation. | Download |
Transferring and copying files from your computer to a Linux servers with SFTP (SSH File Transfer Protocol) protocol
| Platform | Software | Description | url |
|---|---|---|---|
   |
 filezilla filezilla |
FTP and SFTP client | Download |
Viewing and editing files on your computer before transferring on the linux server or directly on the distant server
| Type | Software | url |
|---|---|---|
| Distant, consol mode | nano | Tutorial |
| Distant, consol mode | vi | Tutorial |
| Distant, graphic mode | komodo edit | Download |
| Linux & windows based editor | Notepad++ | Download |
Practice 1: Get Connecting on a linux server by ssh
In mobaXterm:
- Click the session button, then click SSH.
- In the remote host text box, type: bioinfo-master.ird.fr
- Check the specify username box and enter your user name
- In the console, enter the password when prompted. Once you are successfully logged in, you will be use this console for the rest of the lecture.
- Type the command
qhostand comment the result - type the command
qhost -qand noticed what have been added
Practice 2: Reserve one core of a node using qrsh and create your working folder
- Type the command
qstatand noticed the result - Type the command
qstat -u "*"and noticed the difference - Type the command
qrsh -q formation.qthenqstatagain - Type the command
qstatand noticed what have been added - Create your own working folder in the /scratch of your node:
cd /scratch
mkdir formationX- Type the following command with the nodeX of your choice expect the one you are already connected to
ssh nodeX "ls -al /scratch/"Tip: you can use qlogin instead of qrsh if you want to use graphical software
Practice 3 : Transferring files with filezilla sftp
Download and install FileZilla
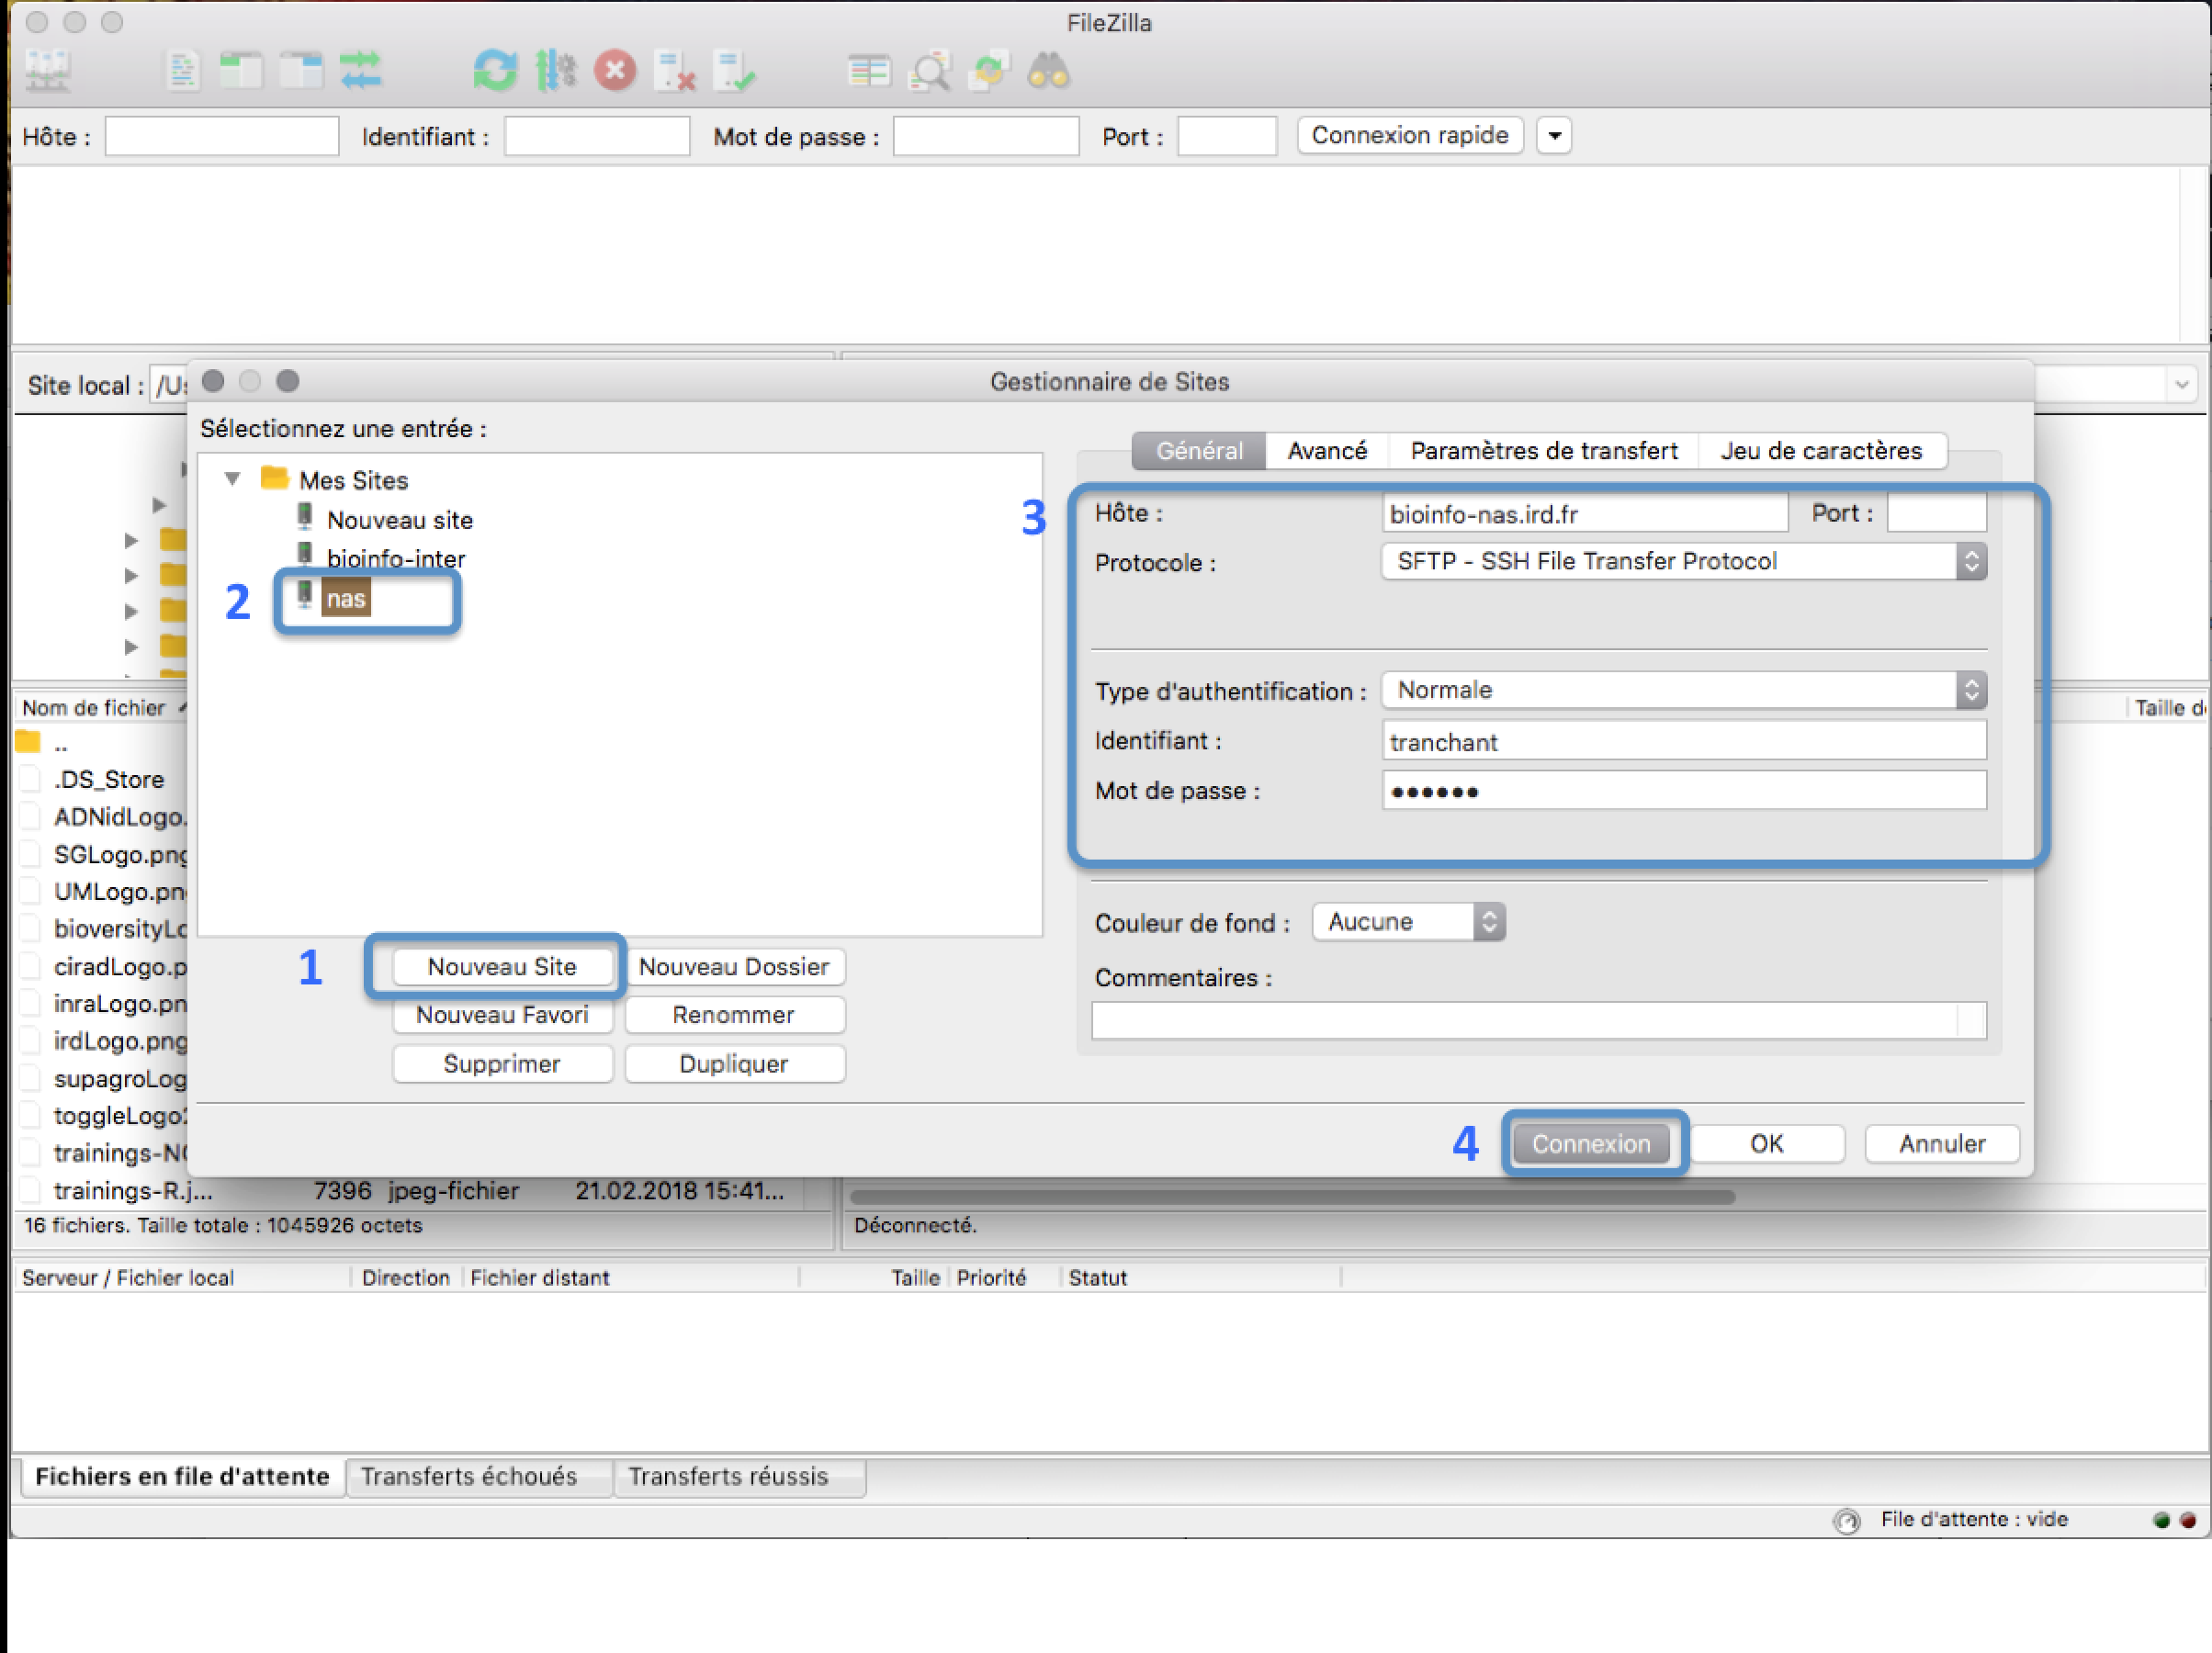
Open FileZilla and save the IRD cluster into the site manager

In the FileZilla menu, go to File > Site Manager. Then go through these 5 steps:
- Click New Site.
- Add a custom name for this site.
- Add the hostname bioinfo-nas.ird.fr to have access to /data2/formation
- Set the Logon Type to “Normal” and insert your username and password used to connect on the IRD cluster
- Press the “Connect” button.
Transferring files

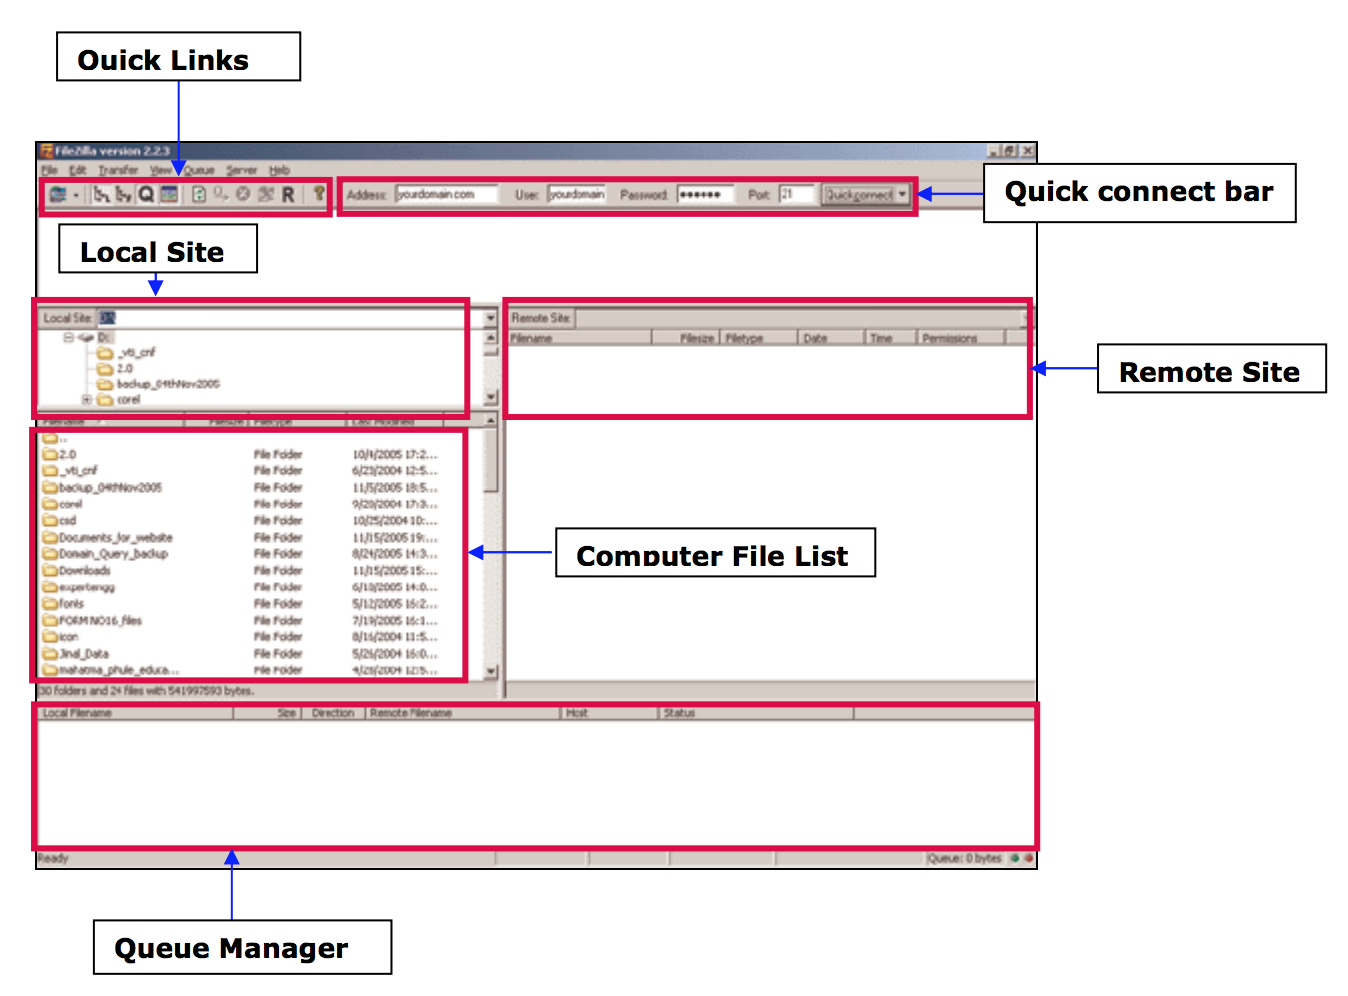
- From your computer to the cluster : click and drag an text file item from the left local colum to the right remote column
- From the cluster to your computer : click and drag an text file item from he right remote column to the left local column
- Retrieve the file HPC_french.pdf from the right window into the folder /data/projects/formation/
Practice 4: Transfer your data from the nas server to the node
- Using scp, transfer the folder
TPassemblylocated in/data2/formationinto your working directory - Check your result with ls
Practice 5: Use module environment to load your tools
- Load ea-utils V2.7 module
- Check if the tool are loaded
Practice 6 : Launch analyses
Get stats on fastq
- Go into the folder
TPassembly/Ebola - Launch the command
fastq-stats ebola1.fastq - Launch the command
fastq-stats -D ebola1.fastq
Perform an assembly with abyss-pe
With abyss software, we reassembly the sequences using the 2 fastq files ebola1.fastq and ebola2.fastq
Launch the commands
module load bioinfo/abyss/1.9.0qsub -q formation.q -l hostname=nodeX -cwd -b y abyss-pe k=35 in=\'ebola1.fastq ebola2.fastq\' name=k35Practice 7: Transfering data to the nas server
- Using scp, transfer your results from your
/scratch/formationXto your/home/login - Check if the transfer is OK with ls
Practice 8: Deleting your temporary folder
 cd /scratch
rm -r formationXexitPractice 9: Launch a job with qsub
Following the several steps performed during the practice, create a script to launch the analyses made in practice6:
1er step: create the SGE section in your script
1) Set a name for your job
2) Precise your email
3) Choose the bioinfo.q queue
2nd step: type the commands you want the script to launch:
1) create a personal folder in /scratch with mkdir
2) Using scp, transfer the folder TPassembly located in /data2/formation into your working directory
3) Launch abyss version 1.9.0 with module load
4) Into the the folder TPassembly/Ebola, lanch the following command:
abyss-pe k=35 in='ebola1.fastq ebola2.fastq' name=k355) Using scp, transfer your results from your /scratch/formationX to your /home/login
6) Delete the personal folder in the /scratch
Bonus:
We are going to launch a 4 steps analysis:
1) Perform a multiple alignment with the nucmer tool
2) Filter these alignments with the delta-filter tool
3) Generate a tab file easy to parse the with show-coords tools
4) Generate a png image with mummerplot
-
Retrieve the script /data2/formation/script/alignment.sh into your /home/formation
-
launch the script with qsub:
qsub -q formation.q alignment.sh-
Do a
ls -altrin your/home/formationX. What do you notice? -
Launch the following command to obtain info on the finished job:
qacct -j JOB_ID-
Open filezilla and retrieve the png image to your computer
-
Launch the following commande to clear the /scratch of the node
ssh nodeX rm -rf /scratch/formationXLinks
- Related courses : Linux for Dummies
- Tutorials : Linux Command-Line Cheat Sheet
License

